概要
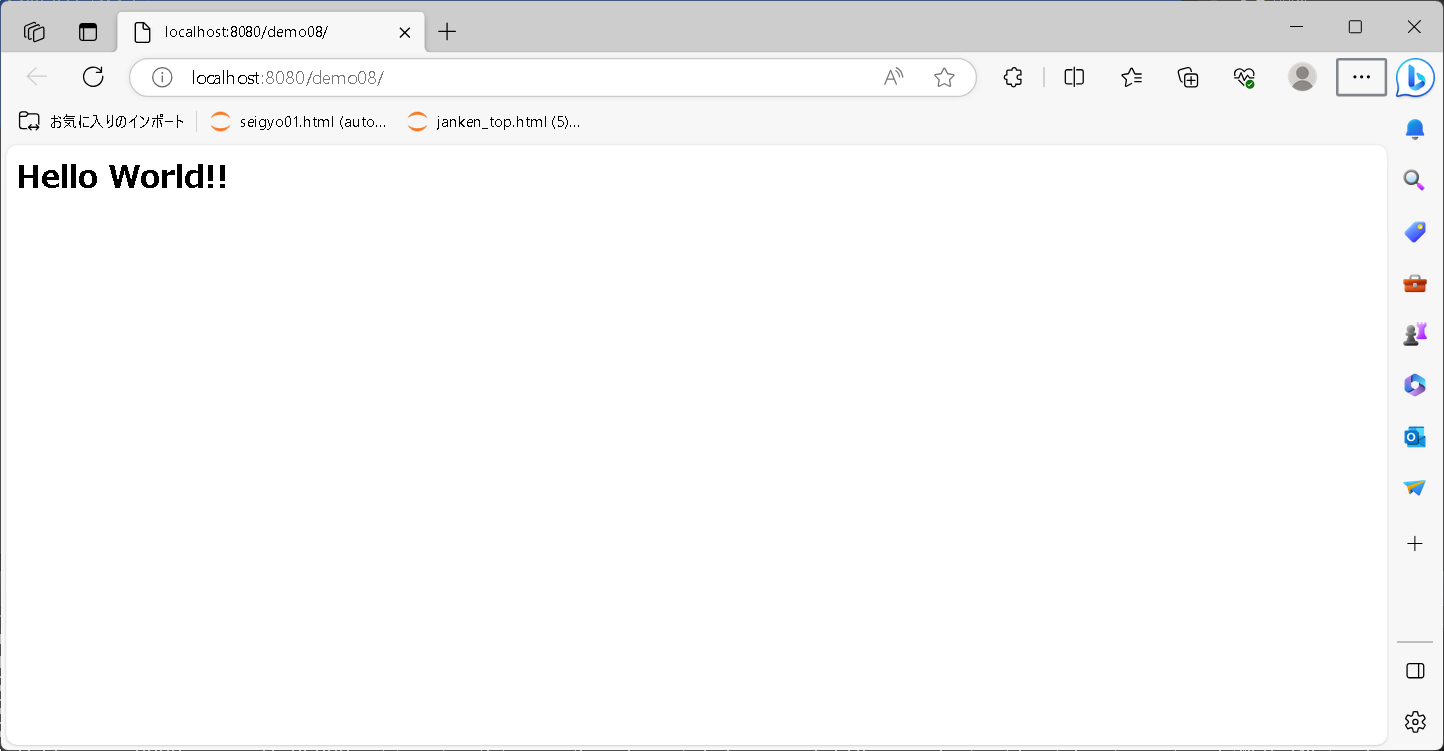
Springを学びなおすにあたり、Spring MVCでHello Worldしたのでその基本的な方法についてまとめた。
前回はBean定義ファイルをJavaのアノテーションベースで作成したが、今回はXMLベースで作成する。
概要 Springを学びなおすにあたり、Spring MVCでHello Worldしたのでその方法についてまとめた。 今回はアノテーションベースのBean定義方法で実装した。 Spring MVCの特徴 Spr[…]
ファイル構成
今回作成するファイルの全体像は以下となる。
ファイル詳細
demo08
│
└─src
    └─main
        ├─java
        │  └─com
        │      └─example
        │          └─app
        │              └─WelcomeController.java
        │
        ├─resources
        │  ├─message.properties
        │  │
        │  └─META-INF
        │      ├─app-webContext.xml
        │      └─applicationContext-08.xml
        │
        └─webapp
            └─WEB-INF
                ├─index.jsp
                └─web.xml
DIコンテナの準備
Spring MVCで実装をすすめるために、ルートアプリケーションコンテキストとWEBアプリケーションコンテキストのDIコンテナを用意する。
ルートアプリケーションコンテキスト
サービス層以下(Service、Repository、DataSourceなど)のBeanを管理するDIコンテナ。
サーブレットコンテナ起動時、ContextLoaderListenerによってルートアプリケーションコンテキストが作成される。
ルートアプリケーションコンテキスト作成時、Bean定義ファイルを読み込んで初期化する。
ルートアプリケーションコンテキストが管理しているBeanは、アプリケーション全体で参照可能になる。
JavaアノテーションベースでHello Worldした際には、AppConfig.javaをBean定義ファイルとしていた。
今回はクラスパス上にMETA-INFフォルダを作成し、Bean定義ファイル(XML)を格納する。
Bean定義ファイル
ルートアプリケーションコンテキストが参照するBean定義ファイルを作成する。
applicationContext-08.xml
<?xml version="1.0" encoding="UTF-8"?>
<beans xmlns="http://www.springframework.org/schema/beans"
	xmlns:xsi="http://www.w3.org/2001/XMLSchema-instance"
	xsi:schemaLocation="
         http://www.springframework.org/schema/beans
         http://www.springframework.org/schema/beans/spring-beans.xsd
       ">
	<!-- ① -->
	<bean id="messageSource"
		class="org.springframework.context.support.ResourceBundleMessageSource">
		<property name="basename" value="message" />
	</bean>
</beans>
上記はResourceBundleMessageSourceをBean定義している。
ResourceBundleMessageSourceはSpringフレームワークが提供しているクラスでメッセージリソース(プロパティファイル)を扱う。
今回はクラスパス上に作成したmessage.propertiesを参照するように設定している。
message.properties
welcome.message=Hello World!!
プロパティファイルの文字コードは「ISO-8859-1」で定義している。
サーブレットコンテナ登録
作成したBean定義ファイルをルートアプリケーションコンテキストに管理させるために、web.xmlにContextLoaderListenerを定義する。
ContextLoaderListenerはサーブレット起動時にルートアプリケーションコンテキスト(DIコンテナ)を作成するリスナクラス。
Bean定義ファイルを指定することで、ルートアプリケーションコンテキストに管理させたいBeanの初期化を行うことができる。
尚、Bean定義ファイルの場所指定がない場合、デフォルトで「/WEB-INF/applicationContext.xml」を参照する。
web.xml
<listener>
	<listener-class>
		org.springframework.web.context.ContextLoaderListener
	</listener-class>
</listener>
<context-param>
	<param-name>contextConfigLocation</param-name>
	<param-value>classpath:/META-INF/applicationContext-08.xml</param-value>
</context-param>
<param-value>タグを使用してBean定義ファイルを指定する。
Webアプリケーションコンテキスト
WEB層のBean(主にController)を管理するDIコンテナ。
DispatcherServlet初期化時に、一緒にWebアプリケーションコンテキストが初期化されてBean定義ファイルを読み込む。
※Service層以下のコンボーネントは、Webアプリケーションコンテキストが管理しているBeanを参照できない
Bean定義ファイル作成
Webアプリケーションコンテキストが参照するBean定義ファイルを作成する。
app-webContext.xml
<?xml version="1.0" encoding="UTF-8"?>
<beans xmlns="http://www.springframework.org/schema/beans"
       xmlns:xsi="http://www.w3.org/2001/XMLSchema-instance"
       xmlns:mvc="http://www.springframework.org/schema/mvc"
       xmlns:context="http://www.springframework.org/schema/context"
       xsi:schemaLocation="http://www.springframework.org/schema/beans
         http://www.springframework.org/schema/beans/spring-beans.xsd
         http://www.springframework.org/schema/mvc
         http://www.springframework.org/schema/mvc/spring-mvc.xsd
         http://www.springframework.org/schema/context
         http://www.springframework.org/schema/context/spring-context.xsd
       ">

	<!-- ① -->
    <mvc:annotation-driven />

	<!-- ② -->
    <context:component-scan base-package="com.example.app" />

	<!-- ③ -->
    <mvc:view-resolvers>
        <mvc:jsp/>
    </mvc:view-resolvers>

</beans>
<mvc:annotation-driven />Spring MVCのアノテーションを有効にする設定。
上記により、@Controllerなどのアノテーションが機能したり@RequestMappingをつけたメソッドとURLをルーティングできたりする。
コントローラーを格納しているパッケージ内にて、@Controllerや@Conponentアノテーションがついたクラスを自動で検索してBean管理する。
<mvc:view-resolvers> <mvc:jsp/></mvc:view-resolvers>Viewリゾルバーの設定。
Controllerから返却される文字列をもとに、WEB-INF配下のjspファイルと紐づける。
指定したフォルダ配下のjspを参照させる設定等もできる。
サーブレットコンテナ登録
作成したBean定義ファイルをWebアプリケーションコンテキストに管理させるために、web.xmlにDispatcherServletを定義する。
DispatcherServletは初期化されるタイミングでWebアプリケーションコンテキストを作成する。
※DispatcherServletにWebアプリケーションコンテキスト(DIコンテナ)がぶら下がっているイメージ
DispatcherServlet初期化時にBean定義ファイルを指定することで、Webアプリケーションコンテキストに管理させたいBeanの初期化を行うことができる。
尚、Bean定義ファイルの場所指定がない場合、デフォルトでWEB-INF/[servlet-name]-servlet.xmlを参照する。
web.xml
<servlet>
	<servlet-name>app</servlet-name>
	<servlet-class>org.springframework.web.servlet.DispatcherServlet
	</servlet-class>
	<init-param>
		<param-name>contextConfigLocation</param-name>
		<param-value>classpath:/META-INF/app-webContext.xml</param-value>
	</init-param>
	<load-on-startup>1</load-on-startup>
</servlet>

<servlet-mapping>
	<servlet-name>app</servlet-name>
	<url-pattern>/</url-pattern>
</servlet-mapping>
<param-value>を指定してBean定義ファイルを指定する。
Hello World
必要な実装準備が整ったので、Hello Worldを実装する。
Controller
URLとルーティングするためコントローラークラスを作成する。
WelcomeController.java
package com.example.app;

import java.util.Locale;

import org.springframework.beans.factory.annotation.Autowired;
import org.springframework.context.MessageSource;
import org.springframework.stereotype.Controller;
import org.springframework.ui.Model;
import org.springframework.web.bind.annotation.RequestMapping;

@Controller
public class WelcomeController {

	@Autowired
	private MessageSource messageSource; // ①

    @RequestMapping("/")
    public String home(Model model) {
        // ②
    	// メッセージプロパティからメッセージ設定
    	String welcomeMsg = messageSource.getMessage("welcome.message", null, Locale.JAPANESE);
    	model.addAttribute("msg", welcomeMsg); // ③

        return "index";
    }

}
@Autowiredprivate MessageSource messageSource;Bean定義したMessageSourceオブジェクトをDIする。
これにより、メッセージプロパティから定義したメッセージを取得できる。
上記の記述をすることで、置換文字列のないメッセージを取得できる。
上記はメッセージプロパティに定義した「welcome.message=Hello World!!」を参照して「Hello World!!」という値を取得している。
model.addAttribute("msg", welcomeMsg);Modelクラスに上記のように記述することで、リクエストスコープに値を格納できる。
index.jsp
<html lang="ja">
<body>
    <h2>${msg}</h2>
</html>
EL(Expression Language)式で${msg}と記述することで、メッセージプロパティから取得した「Hello World!!」を画面表示できる。

補足
最終的なweb.xmlは以下となる。
Javaアノテーションベースで作成したHello Worldの記事に下記の設定内容は紹介しているため、ここでは割愛する。
web.xml
<?xml version="1.0" encoding="UTF-8"?>
<web-app xmlns="http://java.sun.com/xml/ns/javaee"
	xmlns:xsi="http://www.w3.org/2001/XMLSchema-instance"
	xsi:schemaLocation="
      http://java.sun.com/xml/ns/javaee
      http://java.sun.com/xml/ns/javaee/web-app_3_0.xsd
    "
	version="3.0">

	<listener>
		<listener-class>
			org.springframework.web.context.ContextLoaderListener
		</listener-class>
	</listener>
	<context-param>
		<param-name>contextConfigLocation</param-name>
		<param-value>classpath:/META-INF/applicationContext-08.xml</param-value>
	</context-param>
	<filter>
		<filter-name>CharacterEncodingFilter</filter-name>
		<filter-class>
			org.springframework.web.filter.CharacterEncodingFilter
		</filter-class>
		<init-param>
			<param-name>encoding</param-name>
			<param-value>UTF-8</param-value>
		</init-param>
		<init-param>
			<param-name>forceEncoding</param-name>
			<param-value>true</param-value>
		</init-param>
	</filter>
	<filter-mapping>
		<filter-name>CharacterEncodingFilter</filter-name>
		<url-pattern>/*</url-pattern>
	</filter-mapping>

	<servlet>
		<servlet-name>app</servlet-name>
		<servlet-class>org.springframework.web.servlet.DispatcherServlet
		</servlet-class>
		<init-param>
			<param-name>contextConfigLocation</param-name>
			<param-value>classpath:/META-INF/app-webContext.xml</param-value>
		</init-param>
		<load-on-startup>1</load-on-startup>
	</servlet>

	<servlet-mapping>
		<servlet-name>app</servlet-name>
		<url-pattern>/</url-pattern>
	</servlet-mapping>

	<jsp-config>
		<jsp-property-group>
			<url-pattern>*.jsp</url-pattern>
			<page-encoding>UTF-8</page-encoding>
			<include-prelude>/WEB-INF/include.jsp</include-prelude>
		</jsp-property-group>
	</jsp-config>

</web-app>

