概要
Pythonで定時刻になると天気予報BOTから今日と明日の天気予報が配信されるBOTを作成した。
今日と明日の天気予報情報は、WEBスクレイピングで自動収集する。
当記事では天気予報サイトから欲しい情報をWEBスクレイピングで取得する方法についてまとめた。
天気予報BOTの概要
スケジューリングした時刻になると、LINE BOTが予め指定していた地域の今日と明日の天気予報をお知らせする。
※タスクを実行するサイトの都合上、時間通りにはメッセージが届かないので注意
BOTメッセージ
配信される内容は以下のようなフォーマットになる。
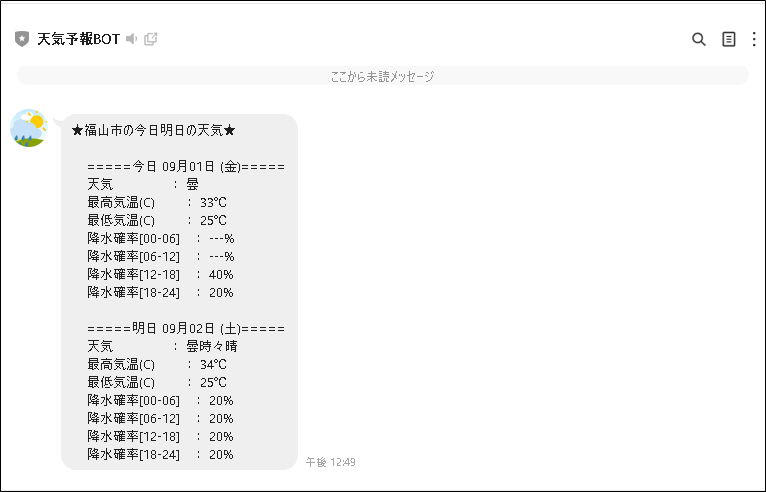
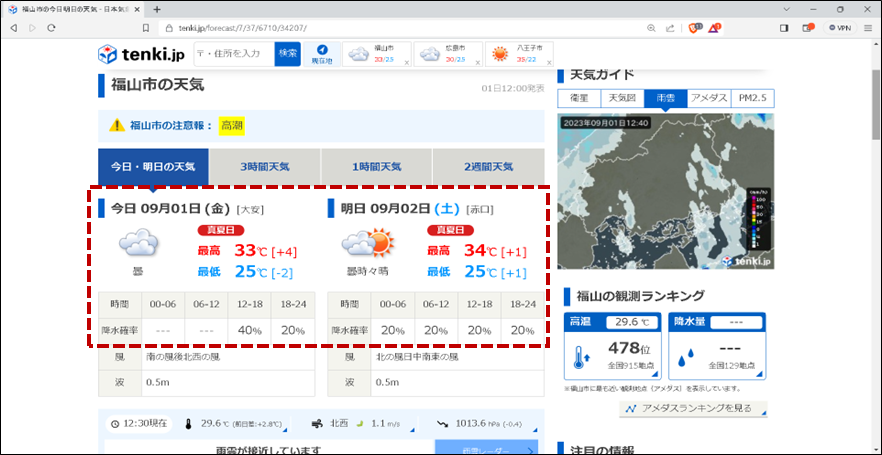
WEBスクレイピングで天気予報情報を取得するサイトは以下となる。
今回は広島県福山市の以下の赤枠部分をWEBスクレイピングで取得する。
チャネルの作成
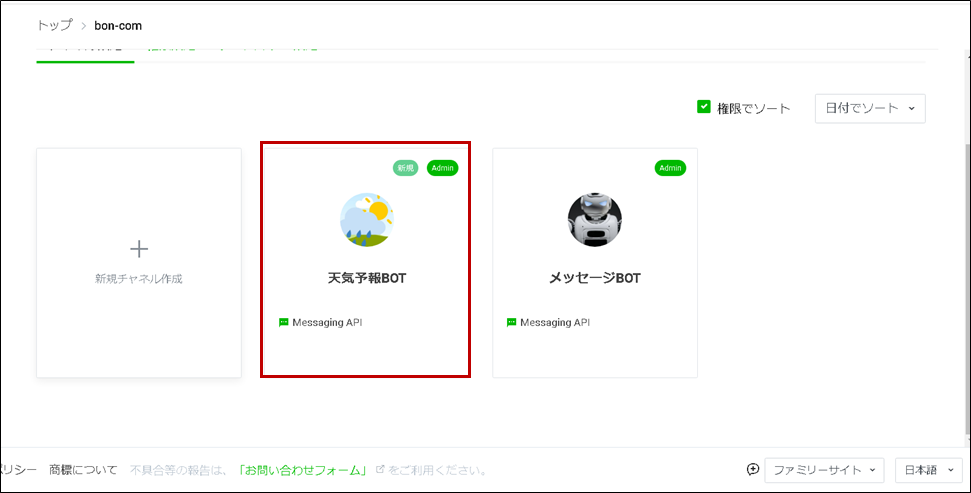
天気予報を配信するチャネル(BOT)を作成する。
チャネルの作成方法は以下を参照。
概要 PythonでLINE BOTを作成したので、作成方法についてまとめた。 LINEの提供するMessaging APIを使用して、友だち登録したLINE BOTよりメッセージを受信するまでの流れを紹介する。 […]
事前準備
作成したチャネルからメッセージを配信できる状態にする。
メッセージ送信確認
作成したチャネルをお友達登録して、LINEメッセージを送れる状態にしておく。
尚、エディタはJupyter Labを使用する。
概要 Pythonの環境構築を行ったので、その方法についてまとめた。どの言語でもプログラミングをする場合、必要な言語ソフトをインストールしたり専用のエディタを用意する必要がある。 そのため、プログラミングをはじめるために[…]
※メッセージ送信方法は前回の記事を参照すること
設定情報
メッセージ送信に必要な情報を取得する。
line_bot.ipynb
import json

with open("settings.json", encoding="utf-8") as f:
    res = json.load(f)

# チャネルアクセストークン
CH_TOKEN = res["CH_TOKEN"]
# ユーザーID
USER_ID = res["USER_ID"]
導通確認
メッセージ送信のための導通確認。
導通確認ができたら、メッセージ送信処理はコメントアウトまたは削除してもOK。
line_bot.ipynb
from linebot import LineBotApi
from linebot.models import TextSendMessage

line_bot_api = LineBotApi(CH_TOKEN)

text_msg = "こんにちは"
messages = TextSendMessage(text=text_msg)
line_bot_api.push_message(USER_ID, messages=messages)
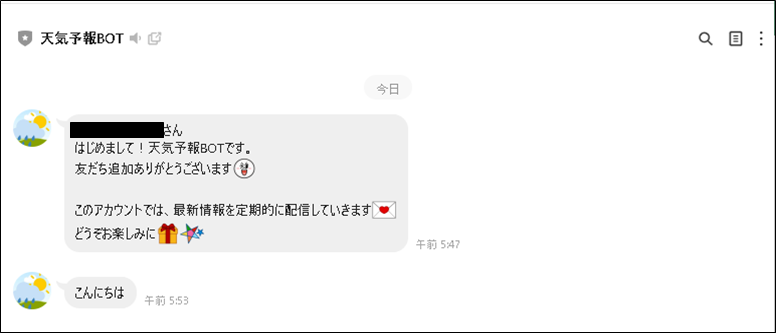
LINE BOTからメッセージが届けば準備完了。
WEBスクレイピング
WEBスクレイピングとは、WEBページの欲しい情報を自動で収集するための技術のこと。
ここではWEBスクレイピングについて、簡単に説明する。
事前準備
必要な資材をインストールするため、以下を記述してShift + Enterを押下する。
Jupyter Lab
!pip install requests
!pip install beautifulsoup4
requestsモジュール
WEBサイトからデータを取得するライブラリ。
スクレイピングしたいサイト情報を取得するために使用する。
beautifulsoup4モジュール
HTMLやXMLの解析を行い、サイト要素を抽出するライブラリ。
サイトから欲しい情報を抽出するために使用する。
WEBスクレイピングの方法
WEBスクレイピングは大きく分けて以下の流れで行う。
②サイト情報を解析
③コンテンツ内の欲しいタグ情報を抽出
WEBサイト情報を取得
以下の記述でWEBサイト情報を取得する。
Jupyter Lab
# 天気予報URL
URL = "https://tenki.jp/forecast/7/37/6710/34207/"
# GETリクエスト
res = requests.get(URL)
取得したいサイトのURLに対して、requestsライブラリのGETリクエストでコンテンツ情報を取得する。
# GETリクエストres = requests.get(URL)上記により広島県福山市の天気予報ページを取得できる。
URLは取得したい地域に合わせて変更すればOK。
サイト情報を解析
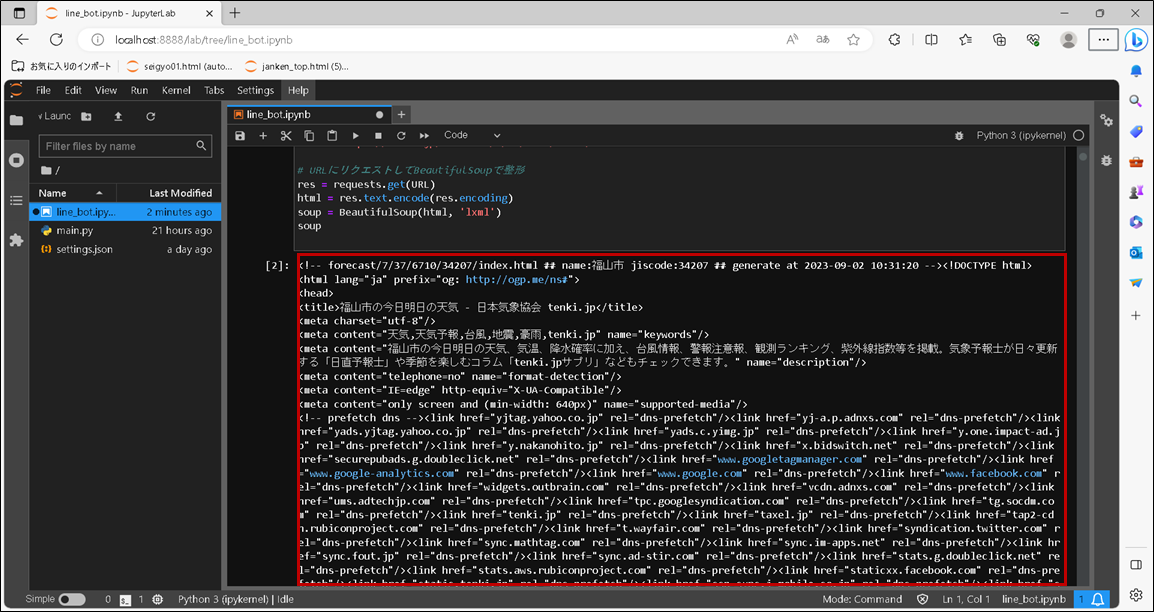
以下の記述で取得したWEBサイト情報を解析する。
Jupyter Lab
html = res.text.encode(res.encoding)
soup = BeautifulSoup(html, 'lxml')
上記のsoupにBeautifulSoupオブジェクトが格納される。
BeautifulSoupオブジェクトから、タグやクラス等を指定して欲しい情報を取得する。
コンテンツ内の欲しいタグ情報を抽出
BeautifulSoupオブジェクト(またはTagオブジェクト)では、主に以下のメソッドを使用してタグ情報を取得する。
・find_all
・select
・text
findメソッド
特定のタグを検索して、最初に見つかったTagオブジェクトを返却する。
以下のようにタグやクラス名などの属性を指定してタグ情報を取得する。
Jupyter Lab
section = soup.find("section", "today-weather")
table = section.find("table")

# tableのTagオブジェクトの中身
#<table>
#<tr>
#<th>時間</th>
#<th>00-06</th>
#<th>06-12</th>
#<th>12-18</th>
#<th>18-24</th>
#</tr>
#<tr class="rain-probability">
#<th>降水確率</th>
#<td><span class="grey">---</span></td>
#<td>20<span class="unit">%</span></td>
#<td>20<span class="unit">%</span></td>
#<td>10<span class="unit">%</span></td>
#</tr>
#<tr class="wind-wave">
#<th>風</th>
#<td colspan="4">南東の風後北の風</td>
#</tr>
#<tr class="wind-wave">
#<th>波</th>
#<td colspan="4">0.5m</td>
#</tr>
#</table>
上記は<section>タグ且つtoday-weatherクラスのタグ情報を取得して、その後Tagオブジェクト内のtableタグに該当する情報(Tagオブジェクト)を取得している。
find_allメソッド
特定のタグを検索して、条件に一致したすべてのTagオブジェクトをリストにして返却する。
Jupyter Lab
table_row = table.find("tr", "rain-probability")
td_list = table_row.find_all("td")

# td_listのリストの中身
#[<td><span class="grey">---</span></td>,
# <td>20<span class="unit">%</span></td>,
# <td>20<span class="unit">%</span></td>,
# <td>10<span class="unit">%</span></td>]
selectメソッド
CSSセレクタを使用して条件に一致したすべてのTagオブジェクトをリストにして返却する。
Jupyter Lab
td_list = table.select(".rain-probability > td")

# td_listのリストの中身
#[<td><span class="grey">---</span></td>,
# <td>20<span class="unit">%</span></td>,
# <td>20<span class="unit">%</span></td>,
# <td>10<span class="unit">%</span></td>]
上記はrain-probabilityクラスの子要素tdタグに該当するTagオブジェクトをリストで取得している。
contentsプロパティ
タグの子要素をリスト(Tagオブジェクト)で取得する。
例えば以下のTagオブジェクトの場合
Jupyter Lab
tag = section.select('.rain-probability > td')[0]
# tagの中身
# <td>10<span class="unit">%</span></td>
contentsプロパティを使用すると、タグ内の要素をリストで取得できる。
Jupyter Lab
tag = section.select('.rain-probability > td')[0]
tag_list = tag.contents
# tag_listの中身
# ['10', <span class="unit">%</span>]
textプロパティ
タグ内のテキストを取得する。
例えば以下のTagオブジェクトの場合
Jupyter Lab
tag = section.select('.rain-probability > td')[0].contents
# tagの中身
# ['10', <span class="unit">%</span>]
textでタグ内のテキストを取得できる。
Jupyter Lab
text1 = tag.contents[0].text
text2 = tag.contents[1].text
# text1の中身
# '10'
# text2の中身
# '%'
また、以下のように記述することでタグ内のすべてのテキストを結合できる。
Jupyter Lab
text3 = tag.text
# text3の中身
# '10%'
天気予報情報の取得
これまで紹介した抽出メソッドとプロパティを使用して今日と明日の天気予報情報を取得する。
Jupyter Lab
import re

# ページタイトル
page_title = soup.title.text
m = re.search(".*天気", page_title)
weather_title = m.group(0)

# 今日明日の天気
weather_list = []

# 今日の天気------------------------------------
today_weather = {}
section = soup.find("section", "today-weather")
# 今日の日付
today_section = section.find("h3", "left-style").contents
today_weather["date_info"] = re.sub("\xa0", " ", f"{today_section[0]} {today_section[1].text}")
# 今日の天気
today_weather["weather"] = section.find("p", "weather-telop").text
# 最高気温
today_weather["high_temperature"] = section.find("dd", "high-temp temp").text
# 最低気温
today_weather["low_temperature"] = section.find("dd", "low-temp temp").text
# 降水確率
today_weather["prob_midnight"] = section.select('.rain-probability > td')[0].text
today_weather["prob_morning"] = section.select('.rain-probability > td')[1].text
today_weather["prob_afternoon"] = section.select('.rain-probability > td')[2].text
today_weather["prob_night"] = section.select('.rain-probability > td')[3].text
# 今日明日の天気リストの格納
weather_list.append(today_weather)

# 明日の天気------------------------------------
tomorrow_weather = {}
# 明日の天気セクション
section = soup.find("section", "tomorrow-weather")
today_section = section.find("h3", "left-style").contents
tomorrow_weather["date_info"] = re.sub("\xa0", " ", f"{today_section[0]} {today_section[1].text}")
# 明日の天気
tomorrow_weather["weather"] = section.find("p", "weather-telop").string
# 最高気温
tomorrow_weather["high_temperature"] = section.find("dd", "high-temp temp").text
# 最低気温
tomorrow_weather["low_temperature"] = section.find("dd", "low-temp temp").text
# 降水確率
tomorrow_weather["prob_midnight"] = section.select('.rain-probability > td')[0].text
tomorrow_weather["prob_morning"] = section.select('.rain-probability > td')[1].text
tomorrow_weather["prob_afternoon"] = section.select('.rain-probability > td')[2].text
tomorrow_weather["prob_night"] = section.select('.rain-probability > td')[3].text
# 今日明日の天気リストの格納
weather_list.append(tomorrow_weather)

# weather_listの中身
#[{'date_info': '今日 09月02日 (土)',
#  'weather': '曇のち晴',
#  'high_temperature': '32℃',
#  'low_temperature': '25℃',
#  'prob_midnight': '---',
#  'prob_morning': '20%',
#  'prob_afternoon': '20%',
#  'prob_night': '10%'},
# {'date_info': '明日 09月03日 (日)',
#  'weather': '晴',
#  'high_temperature': '36℃',
#  'low_temperature': '24℃',
#  'prob_midnight': '10%',
#  'prob_morning': '10%',
#  'prob_afternoon': '0%',
#  'prob_night': '10%'}]
一部正規表現を使用しているが、reライブラリの使用方法は以下を参照すること。
概要 Pythonのreモジュールを使用して、正規表現をどのように使用するのかをまとめた。 正規表現のパターン 文字列から特定のパターンを探す際に、正規表現を使用する。パターンは[…]
②①で取得したTagオブジェクトから必要な情報を取得してdictデータに格納
③明日の天気予報タグ内のコンテンツをTagオブジェクトとして取得
④③で取得したTagオブジェクトから必要な情報を取得してdictデータに格納
⑤今日と明日のdictデータをリストに格納
次回は取得した今日と明日の天気予報情報をもとに、定時刻になるとメッセージ配信する方法について紹介する。


